Commands
1 | # create a branch |
Branches in a Nutshell
To really understand the way Git does branching, we need to take a back and examine how Git stores its data. Git doesn’t store data as a series of changesets or differents, but instead as a series of snapshots. When you make a commit, Git stores a commit object that contains a pointer to the snapshot of the content you staged. This object also contains the author’s name and email address, the message that you typed, and the pointer to the commit or commits that directly came before this commit (its parent or parents): zero parents for the inital commit, one parent for a normal commit, and multiple parents for a commit that results from a merge of two of more branches.
A branch in Git is simply a lightweight movable pointer to one of these commits.
When you create a new branch, Git creates a new pointer for you to move around. And How does Git know what branch you’re currently on? Git keeps a special pointer called HEAD, it is the symbolic name for the currently checkout out commit — it’s essentially what commit you’re working on top of. Normally HEAD attaches to a branch, when you commit, the status of that branch is altered. When HEAD attaches to a commit instead of a branch, this phenomenon is called detach.
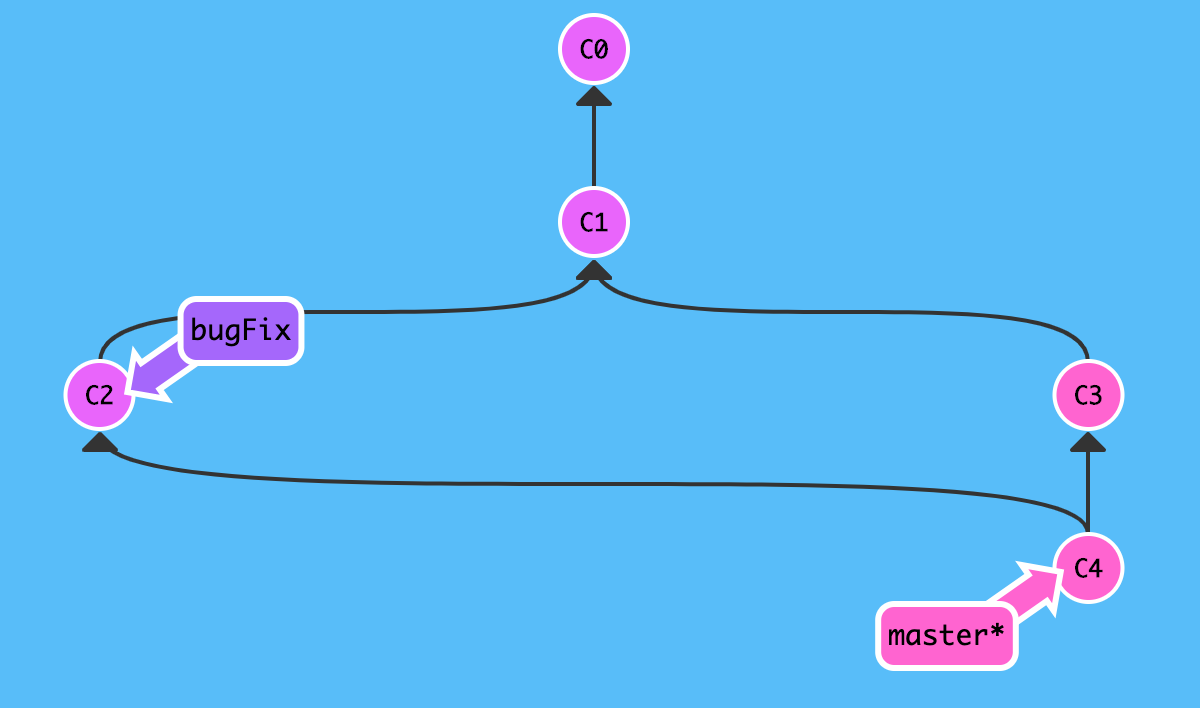
Basic Branching and Merging
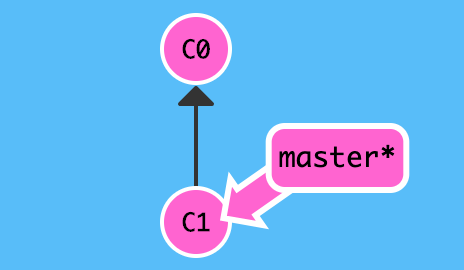
1 | $ git checkout -b bugFix |
Remote Branches
Look at an example, let’s say you have a Git server on your network at git.ourcompany.com. If you clone from this, Git’s clone command automatically names it origin for you, pulls down all its data, creates some pointers to correspond to remote branches, the name of remote branchs in local will has a prefix like remotes/ or remotes/origin/. Git also gives you your own local master branch starting at the same places as origin’s master branch, so you have something to work from.
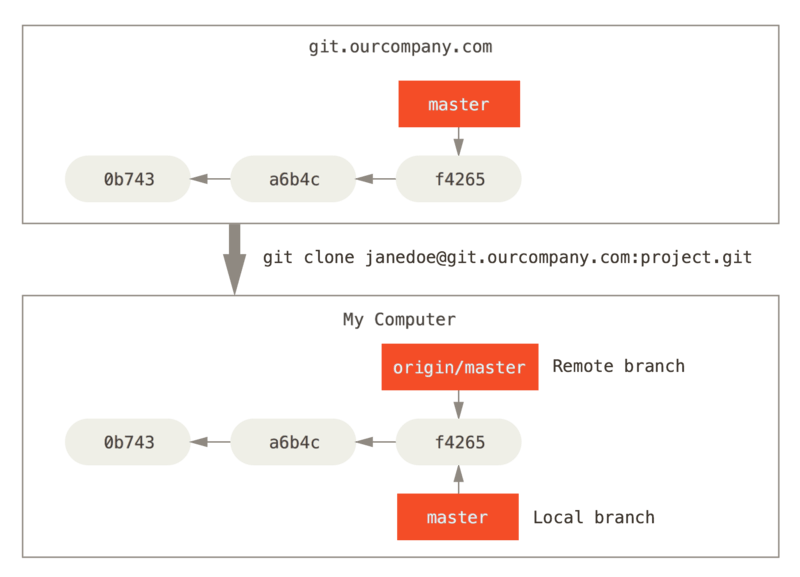
If you do some work on your local master branch, and, in the meantime, someone else pushes to git.ourcompany.com and updates its master branch, then your histories move forward differently. Also, as long as you stay out of contact with your origin server, your origin/master pointer doesn’t move.
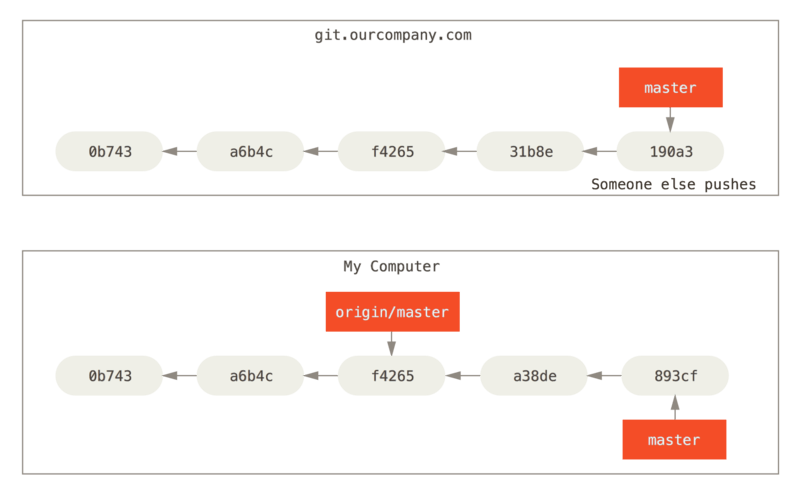
To synchronize your work with a given remote, you run a git fetch <remote> command. This command fetches any data from the given remote that you don’t yet have, and updates your local database, moving your origin/master pointer to its new, more up-to-data position.
It’s important to note that when you do a fetch that brings down new remote-tracking branches, you don’t automatically have local, editable copies of them. In other words, in this case, you don’t have a new branch — you have only an origin/master pointer that you can’t modify.
![]()
When you want to share a branch with the world, you need to push it up to a remote to which you have write access. Your local branches aren’t automatically synchronized to the remotes you write to — you have to explicitly push the branches you want to share. That way, you can use private branches for work you don’t want to share, and push up only the topic branches you want to collaborate on.
If you have a branch named serverfix that you want to work on with others, you can push it up the same way you pushed your first branch. Run git push <remote> <branch>:
1 | $ git push origin serverfix |
This is a bit of a shortcut. Git automatically expands the serverfix branchname out to refs/heads/serverfix:refs/heads/serverfix, which means, “Take my serverfix local branch and push it to update the remote’s serverfix branch.” You can also do git push origin serverfix:serverfix, which does the same thing — it says, “Take my serverfix and make it the remote’s serverfix.” You can use this format to push a local branch into a remote branch that is named differently. If you didn’t want it to be called serverfix on the remote, you could instead run git push origin serverfix:awesomebranch to push your local serverfix branch to the awesomebranch branch on the remote project.
Checking out a local branch from a remote-tracking branch automatically creates what is called a “tracking branch”, and the branch it tracks is called an “upstream branch”. Tracking branches are local branches that have a direct relationship to a remote branch. If you’re on a tracking branch and type git pull, Git automatically know which server to fetch from and which branch to merge in. If you want to change the upstream branch you’re tracking, you can use the -u or --set-upstream-to option to git branch to explicitly set it at any time.
Rebasing
It turns out that in addition to the commit SHA-1 checksum, Git also calculates a checksum that is based just on the patch introduced with the commit, this is called a “patch-id”.
In addition to merge, if you want to integrate changes from experiment into master, there is another way.
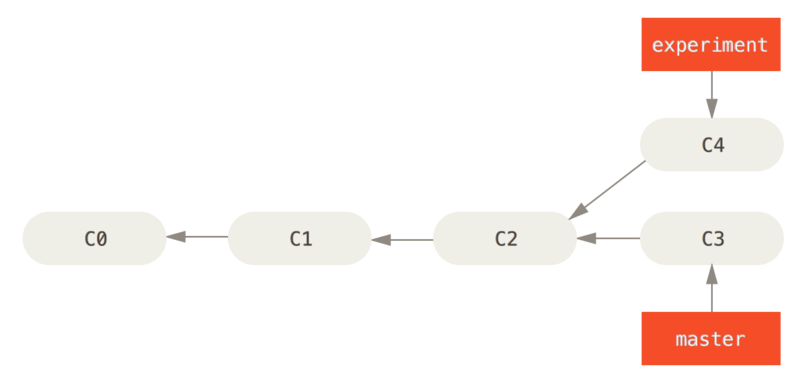
You can take the patch of the change that was introduce in C4 and reapply it on top of C3. In Git, this is called rebasing. With the rebase command, you can take all the changes that were committed on one branch and replay them on a different branch.
1 | $ git checkout experiment |

At this point, you can go back to the master branch and do a fast-forward merge.
1 | $ git checkout master |

Rebasing replays changes from one line of work onto another in the order they were introduced, whereas merging takes the endpoints and merges them together. There is no difference in the end product of the integration, but rebasing makes for a cleaner history. In addition, when you rebase stuff, you’re abanding existing commits and creating new ones that are similar but different.
If there is any conflict while you are rebasing, you should fix the conflict, and then use git add to stage the files, use git rebase --continue to finish the rebasing process. In this process, do not use git commit, it will create a commit and detach the HEAD!

